Figure Images: Deep Zoom with IIIF
Adding high-resolution zooming images to your project
Create a Zooming Image
You can create a zooming image with Quire by adding zoom: true to an image entry in your figures.yaml file. For example:
- id: fig-01
  src: figures/fig-01.jpg
  zoom: true
As with other figure images in Quire, zooming images can be displayed within your Markdown pages by referencing the id in either the {% figure %} or {% figuregroup %} shortcode, or using the built-in image viewer that appears on entry pages. (Learn more about entry pages in the Collection Catalogues section of this documentation.)
To learn how Quire creates these zooming images, see the Preview and Build a Project with Zooming Images section below. In the meantime, here are some tips for how to make this process as seamless as possible.
While Quire supports multiple file formats for zooming images, the tool currently converts .jpg, .jpeg, .tif, .tiff, .png, and .svg files to JPGs. Therefore, to significantly improve processing time, we recommend using JPGs as a source file whenever possible. It is also advised to avoid TIFs as those files tend to be cumbersome. In the future, .png and .svg files will be converted to PNGs in order to support transparency.
Images must be larger than 512px on the long side. Setting zoom: true on images that are smaller than this will result in them not showing up in the image viewer at all.
There is no maximum size limit for a zooming image, and the larger the source file the deeper the zoom. However, very large files will take longer to process when running quire preview or build, and longer to load for users. For this reason, we recommend limiting images to 8,192px on the longest side. This offers a rich zooming experience without dragging out processing time or being size intensive.
In short …
- Accepted file formats:
.jpg,.jpeg,.tif,.tiff,.png, or.svg(but use JPGs rather than TIFs for source images, as TIFs are large and will be converted to JPG anyway) - Minimum image size: Greater than 512px on the long side
- Maximum image size: None, but we recommend limiting to 8,192px on the long side
- The +/- signs typically used to zoom in and out of an image are currently not working in v1. Instead zooming can be achieved by scrolling or pinching. Work is currently underway to add these controls back. Follow our progress in GitHub issue #815.
Preview and Build a Project with Zooming Images
Quire uses the International Image Interoperability Framework (IIIF) to manage its advanced image features including zooming, layered, and rotating images. IIIF (referred to when speaking as “Triple I F”) is a shared, open set of standards for storing images and image data. These standards allow for seamless and regularized sharing and display of those images for various uses within a project, an institution, or across different institutions. IIIF is a growing standard, particularly in the academic, art, and cultural heritage sectors.
For IIIF zooming images, Quire takes the original source image and processes it into hundreds of individual image tiles. Each tile comprises a portion of the image at a particular zoom level which will be tiled back together and displayed in the lightbox viewer as users pan and zoom around the image. (Quire’s default tile size is 256px square. Advanced users can change this setting in _plugins/figures/iiif/config.js.)
The creation of these tiles happens every time you run quire preview or build and will be logged in the command-line shell:
[quire] DEBUG	 Figures:ImageProcessor   processing inputPath: /my-project/content/_assets/images/figures/fig-01.jpg
[quire] DEBUG	 Figures:ImageTiler       tiling '/my-project/content/_assets/images/figures/fig-01.jpg'
[quire] INFO	 Figures:IIIF:Manifest    Generated manifest for figure "fig-01"
To speed development time, Quire will skip processing zooming images that have previously been processed.
[quire] DEBUG Figures:ImageTiler skipping previously tiled image '/my-project/content/_assets/images/figures/fig-01.jpg'
- If you replace a zooming image but keep the same filename, you should delete both the
publicand_sitedirectories in your project if they exist, before runningquire previeworbuildto ensure the replaced image is not skipped by the IIIF image tiler.
Improve Performance
As you exceed a hundred or more zooming images in your project, you are likely to encounter some performance issues both on the development end (when running commands like quire preview and quire build) and on the user end (when a reader is looking at your finished Quire site).
If you encounter any difficulties please let us know on the community forum. We are currently working on improving image performance in Quire as you can see in GitHub issue #815. When this work is complete, we will share advice for mitigating issues as they occur.
Some basic tips for now include:
- Optimize your source images. The larger the file size in megabytes, the more time it will take to process when your project is building.
- Don’t use too many images on one page or in one lightbox
- Use placeholder images until ready to build the actual work
- Host images externally (see the following section)
Add Existing External IIIF Images
In addition to creating deep zooming images in your Quire project by adding zoom: true to a figures.yaml entry, you can also use existing external IIIF images. This is achieved with two steps:
- Download the image from another institution’s website (usually there will be either a IIIF logo or language that confirms it’s a IIIF image) and then save it to your
_assets/images/directory. - Add the additional attributes
manifestId,canvasId, andprintImageto thefigures.yamlentry as depicted in the example below.
- id: "irises"
  manifestId: https://media.getty.edu/iiif/manifest/53be857e-41e8-4198-b45d-2e0f52d3051b
  canvasId: https://media.getty.edu/iiif/manifest/canvas/e5d29650-11f8-4897-9540-54a9dd65b04f.json
  printImage: figures/irises.jpg
  src: figures/irises.jpg
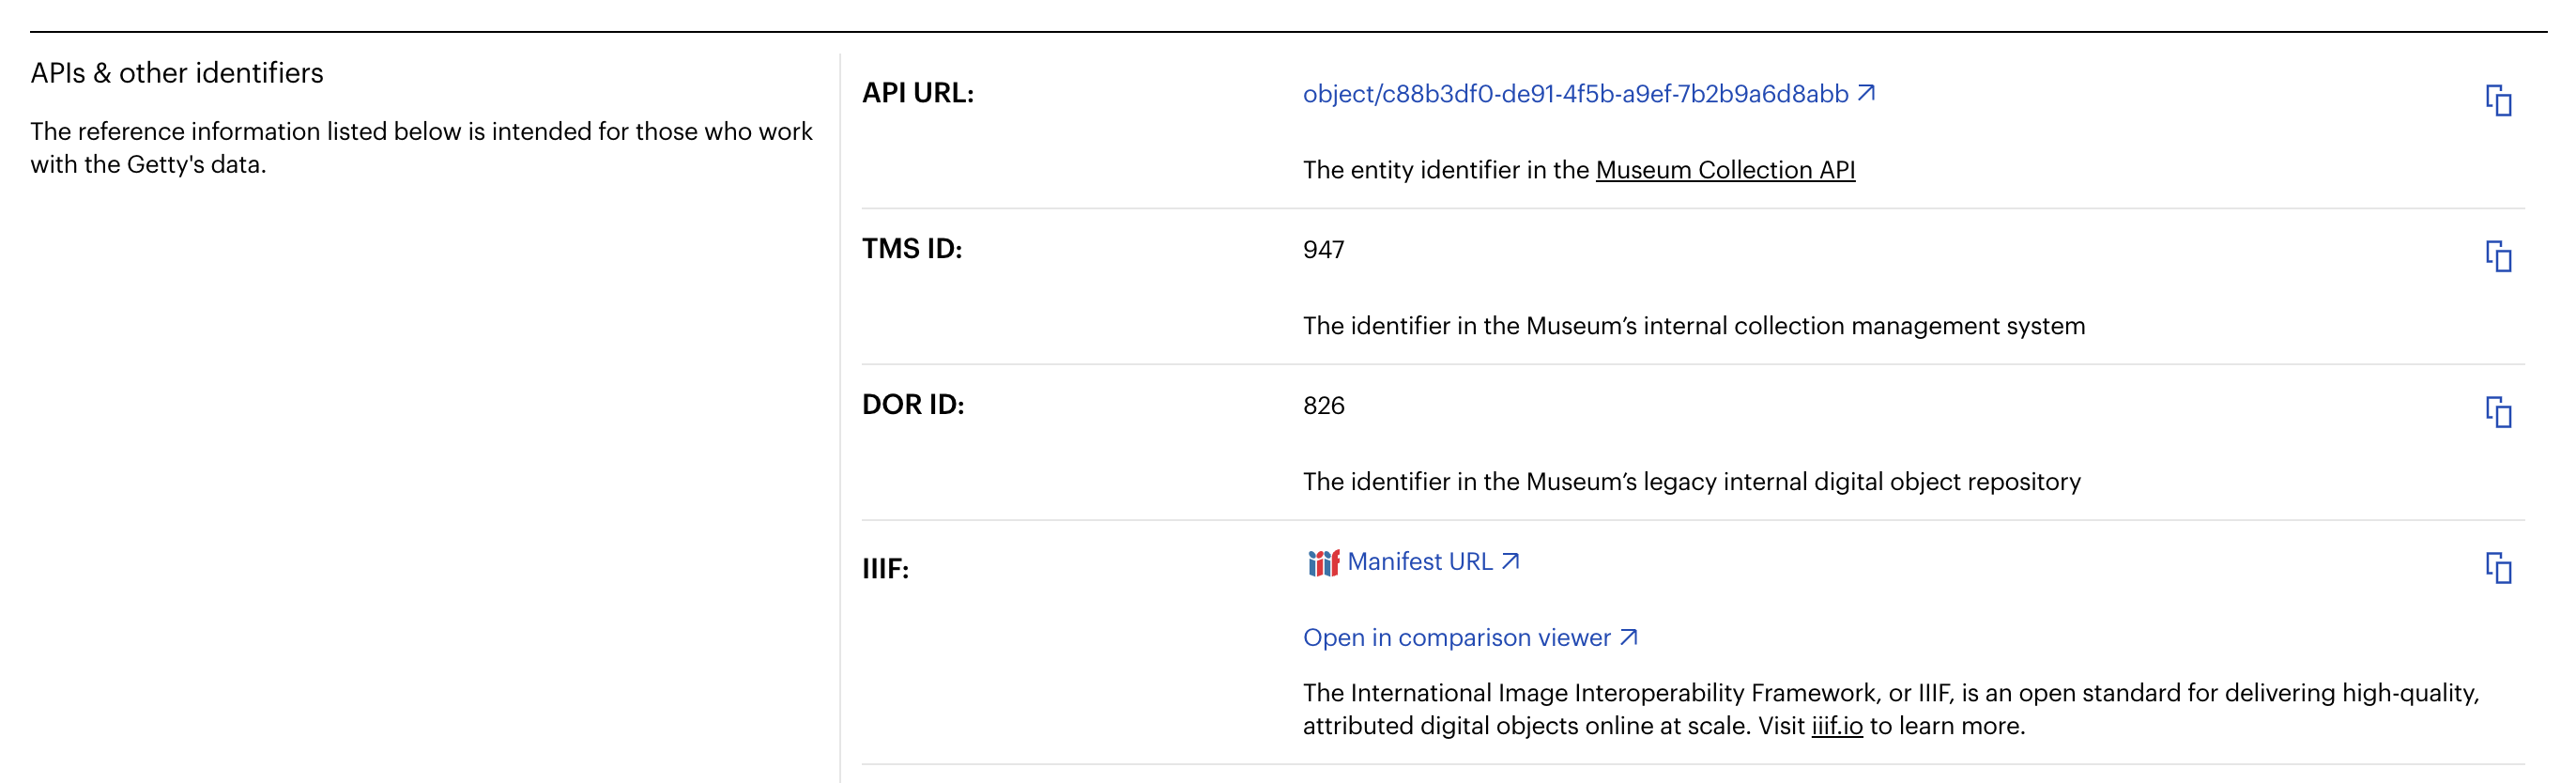
The manifestId or manifest URL is a link to a JSON file that contains important metadata about an object including things like artist, name, and copyright information. A manifest URL will always accompany a IIIF image, however, each institution displays this information a bit differently. Sometimes there is a IIIF button that will take you to a manifest, other institutions might include the manifest URL below or alongside the tombstone information on an object’s collection page. Here is an example of where the manifest URL is found towards the bottom of the Getty collection page for Van Gogh’s Irises:
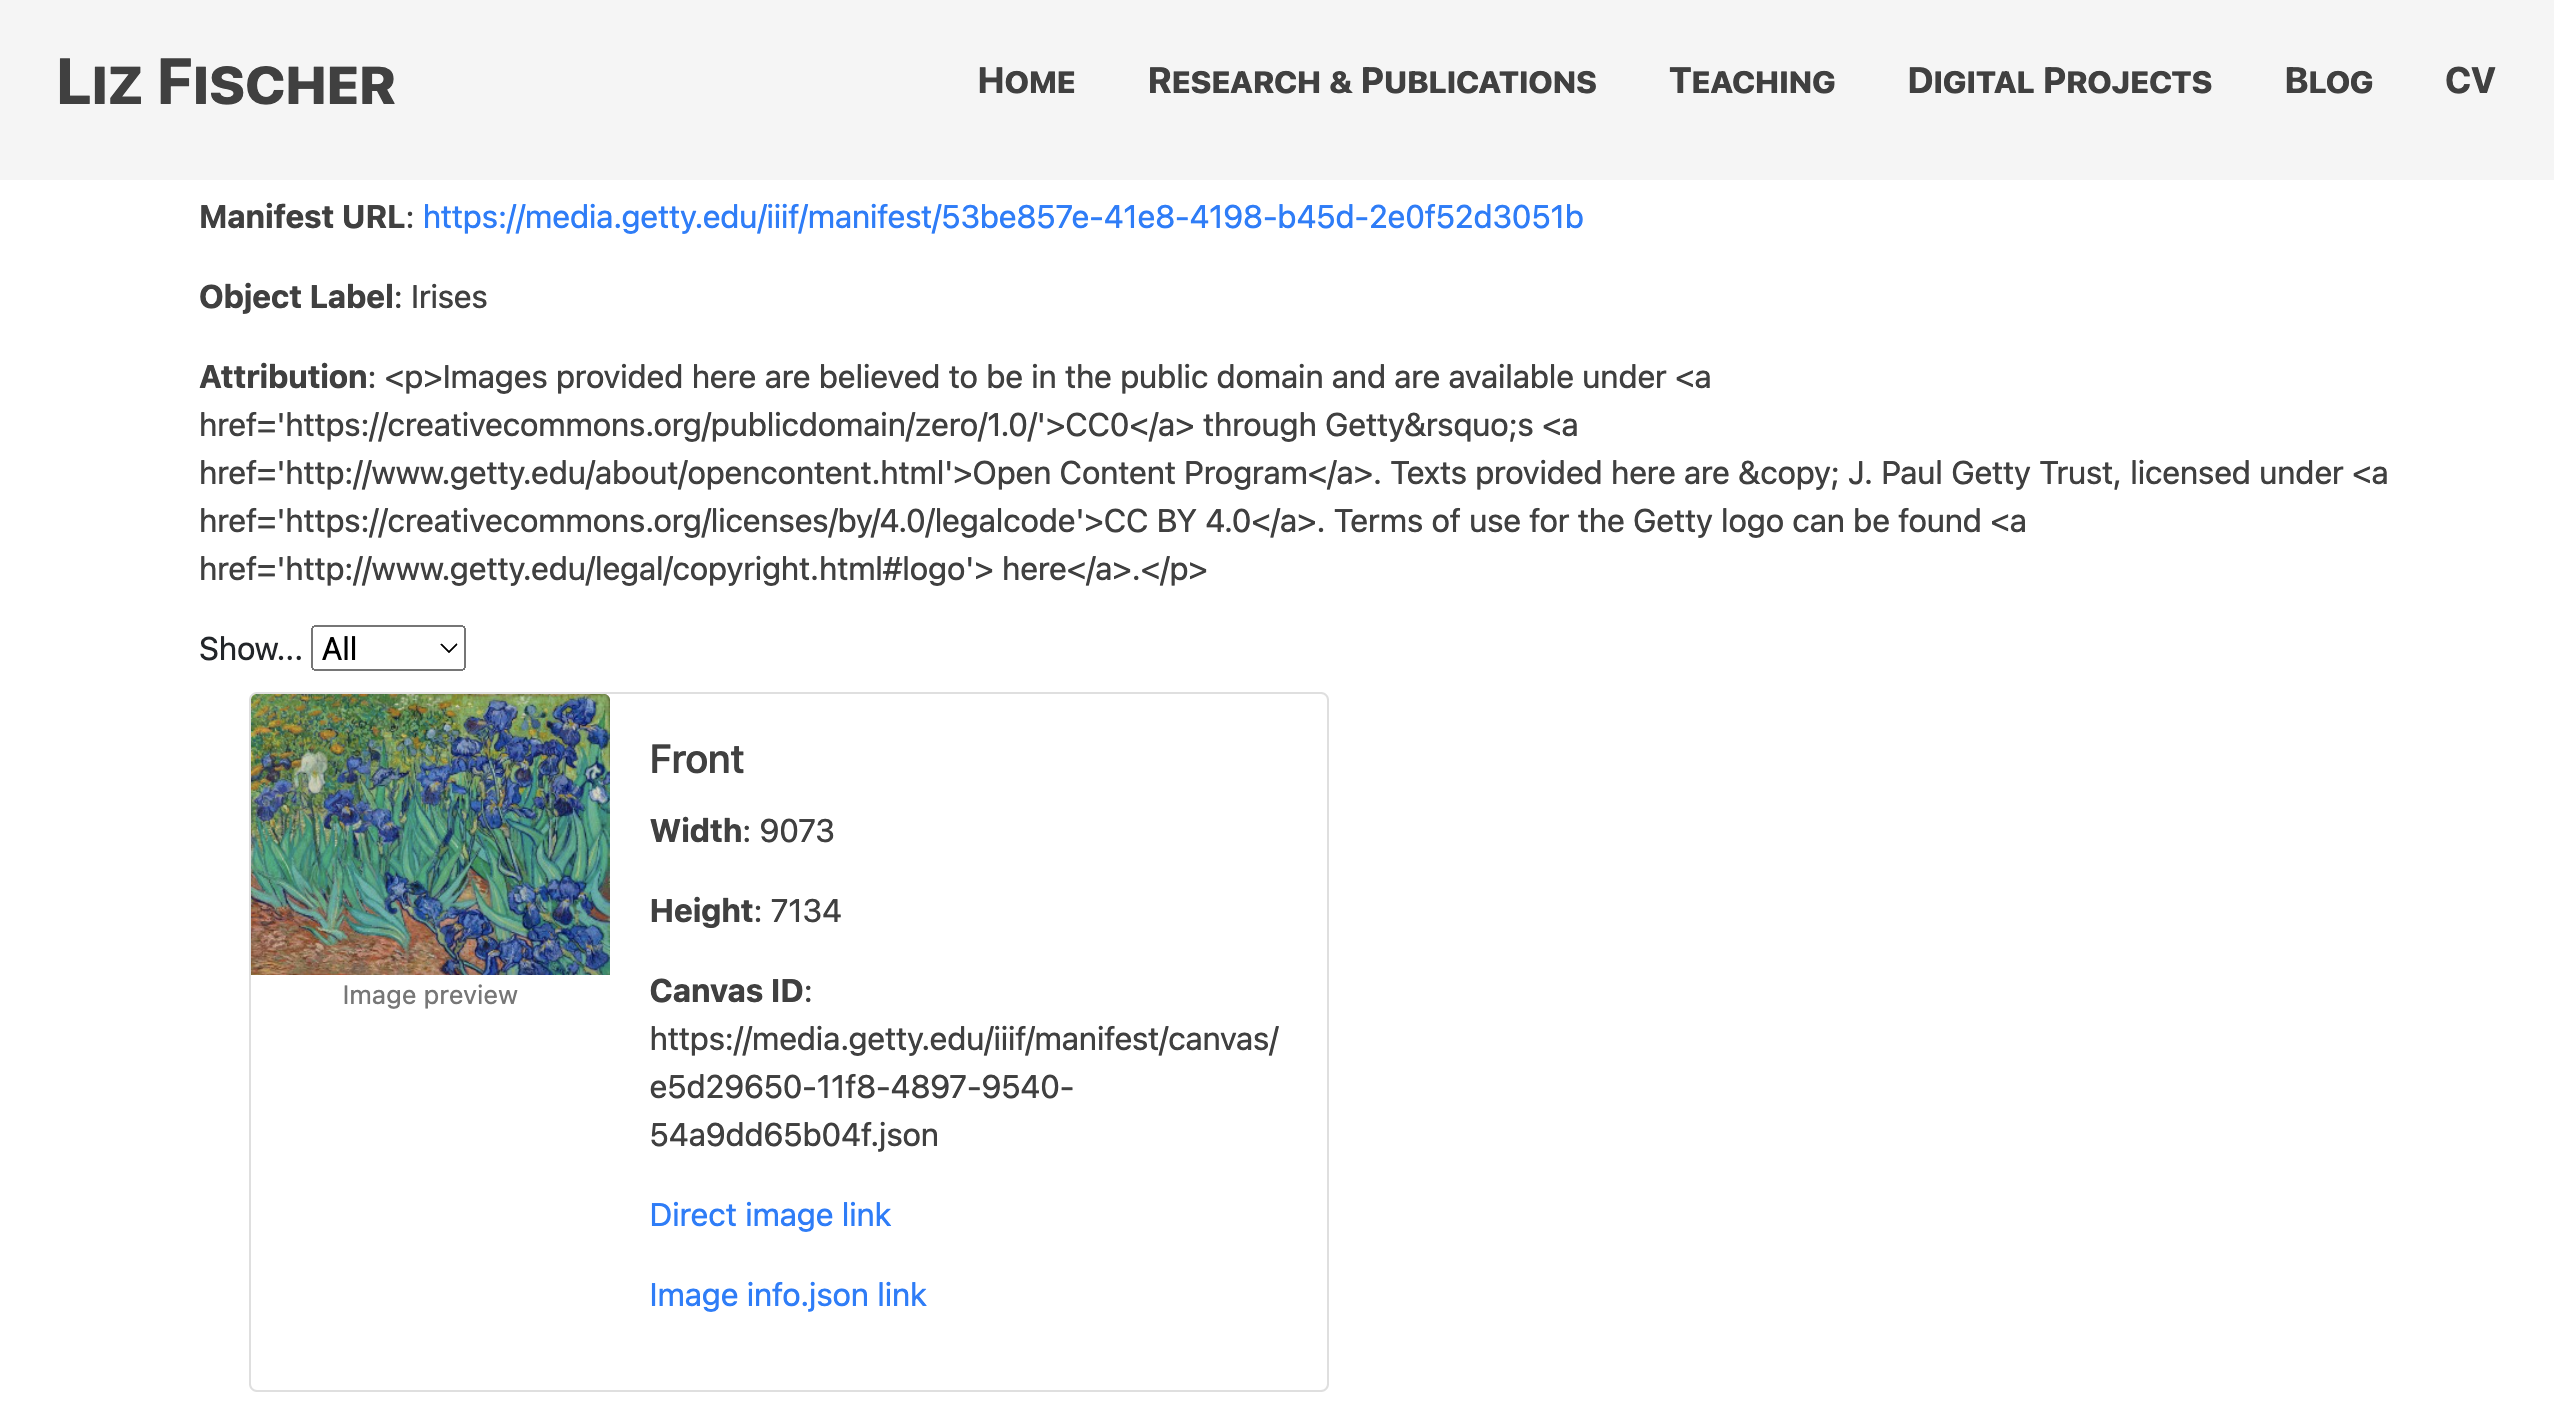
The next attribute you need to include in the figures.yaml is the canvasId. Every institution’s manifest is formatted differently so locating the canvasID can be a bit tricky. The easiest way to find it is with a tool like Liz Fischer’s IIIF Manifest Explorer. If you plug the manifest URL (manifestId) into the URL bar, the tool will breakdown all the metadata in the manifest so it is easier to read, including identifying the canvasID which you will then add to your figures.yaml entry.
In the figures.yaml you will also need to include a printImage attribute and a src attribute. These will have the same value, which, rather than pointing to an external URL for the IIIF image, should point to where you have saved the image in your project. For the example above, irises.jpg is saved in the projects _assets/images/figures folder. In the future, we aim to eliminate this redundancy.
- To work properly, external IIIF image manifests must use version 3.0 of the IIIF Presentation API.